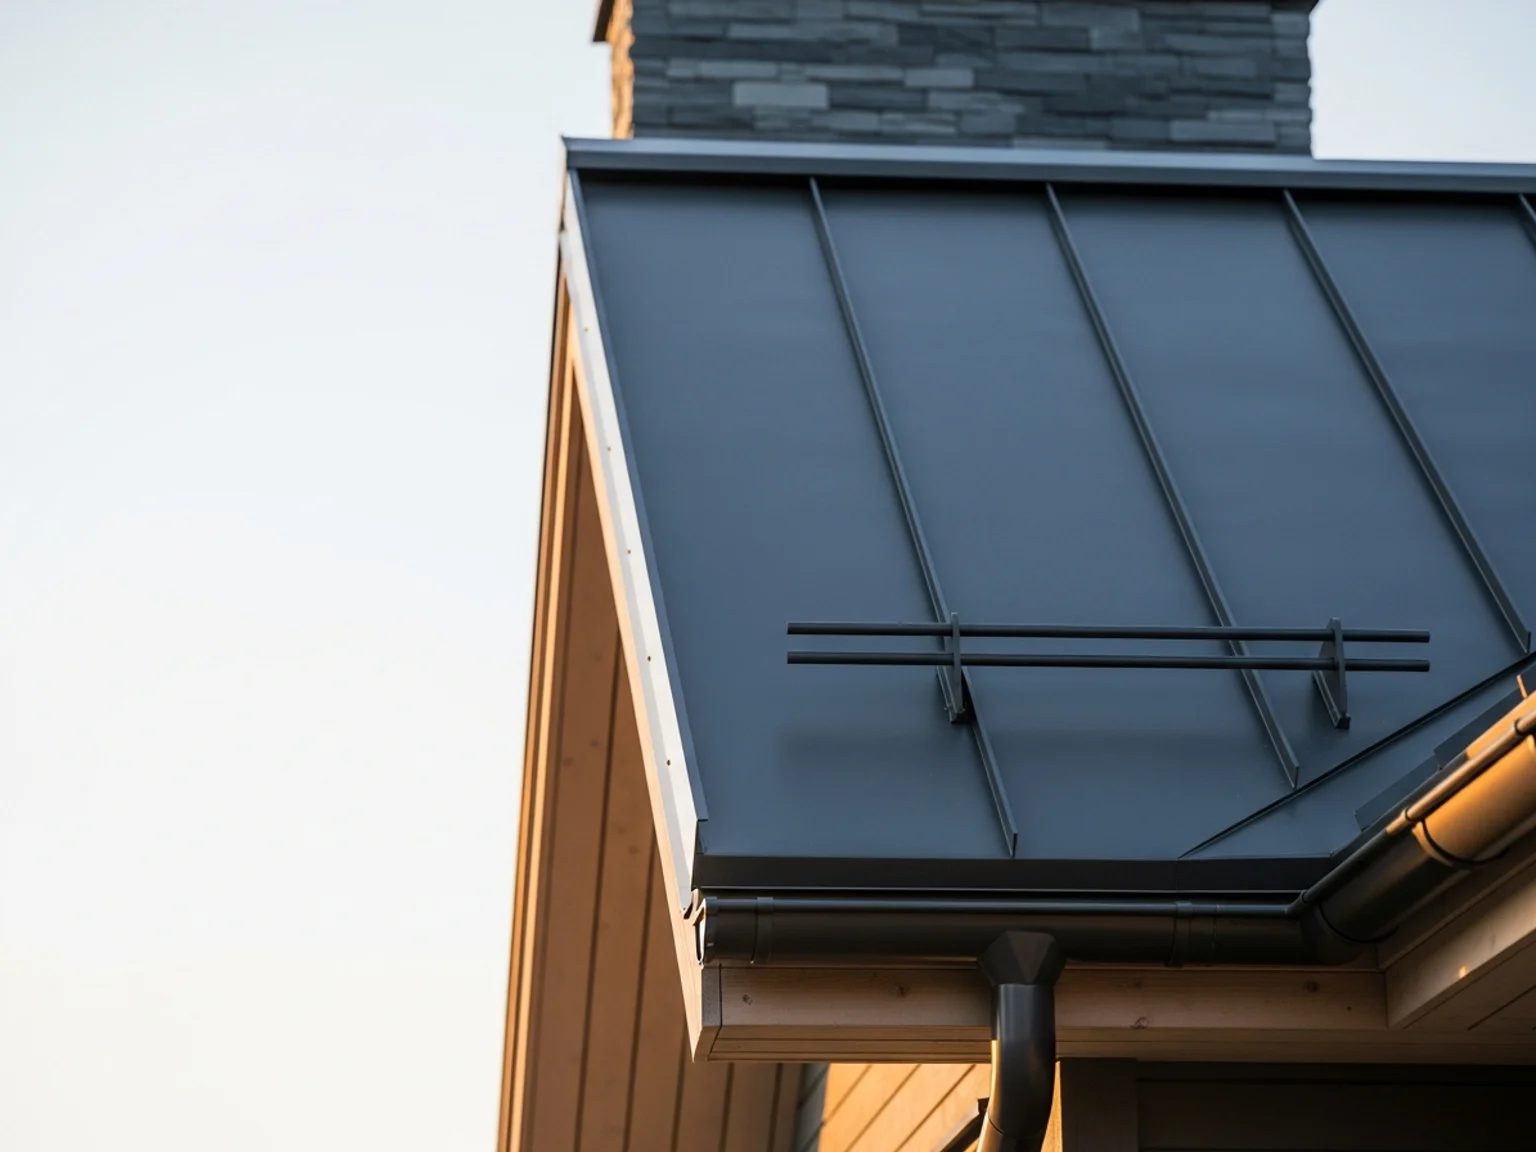
Katon läpiviennit ovat kohtia, joissa putki, kanava, savupiippu, kattoikkuna tai muu rakenne lävistää katemateriaalin ja aluskatteen. Jokainen läpivienti muodostaa potentiaalisen vuotokohdan, ja tilastojen mukaan yli puolet kaikista kattovuodoista johtuu juuri läpivientien tiivistysvirheistä tai vanhenemisesta. Suomalaisessa omakotitalossa on tyypillisesti 5–15 läpivientiä, joiden kuntoon on kiinnitettävä erityistä huomiota. Läpivientejä tarvitaan viemärin tuuletusputkille, ilmanvaihtokanavien ulospuhalluskanavalle, antennimastolle, savupiipulle ja mahdollisille kattoikkunoille. Jokainen läpivientityyppi edellyttää omanlaistaan tiivistysratkaisua, ja käytettävät materiaalit ja menetelmät vaihtelevat katemateriaalin ja kattokaltevuuden mukaan. Läpivientien suunnittelussa keskeistä on minimoida niiden lukumäärä ja sijoittaa ne mahdollisimman lähelle harjaa. Harjan läheisyydessä veden virtaus on vähäisempää, mikä pienentää vuotoriskiä. Läpivientejä ei koskaan sijoiteta jiiriin, kalmistoon tai katon muihin sisäkulmiin, joissa vesi kerääntyy.
Läpivientityypit ja tiivistysratkaisut
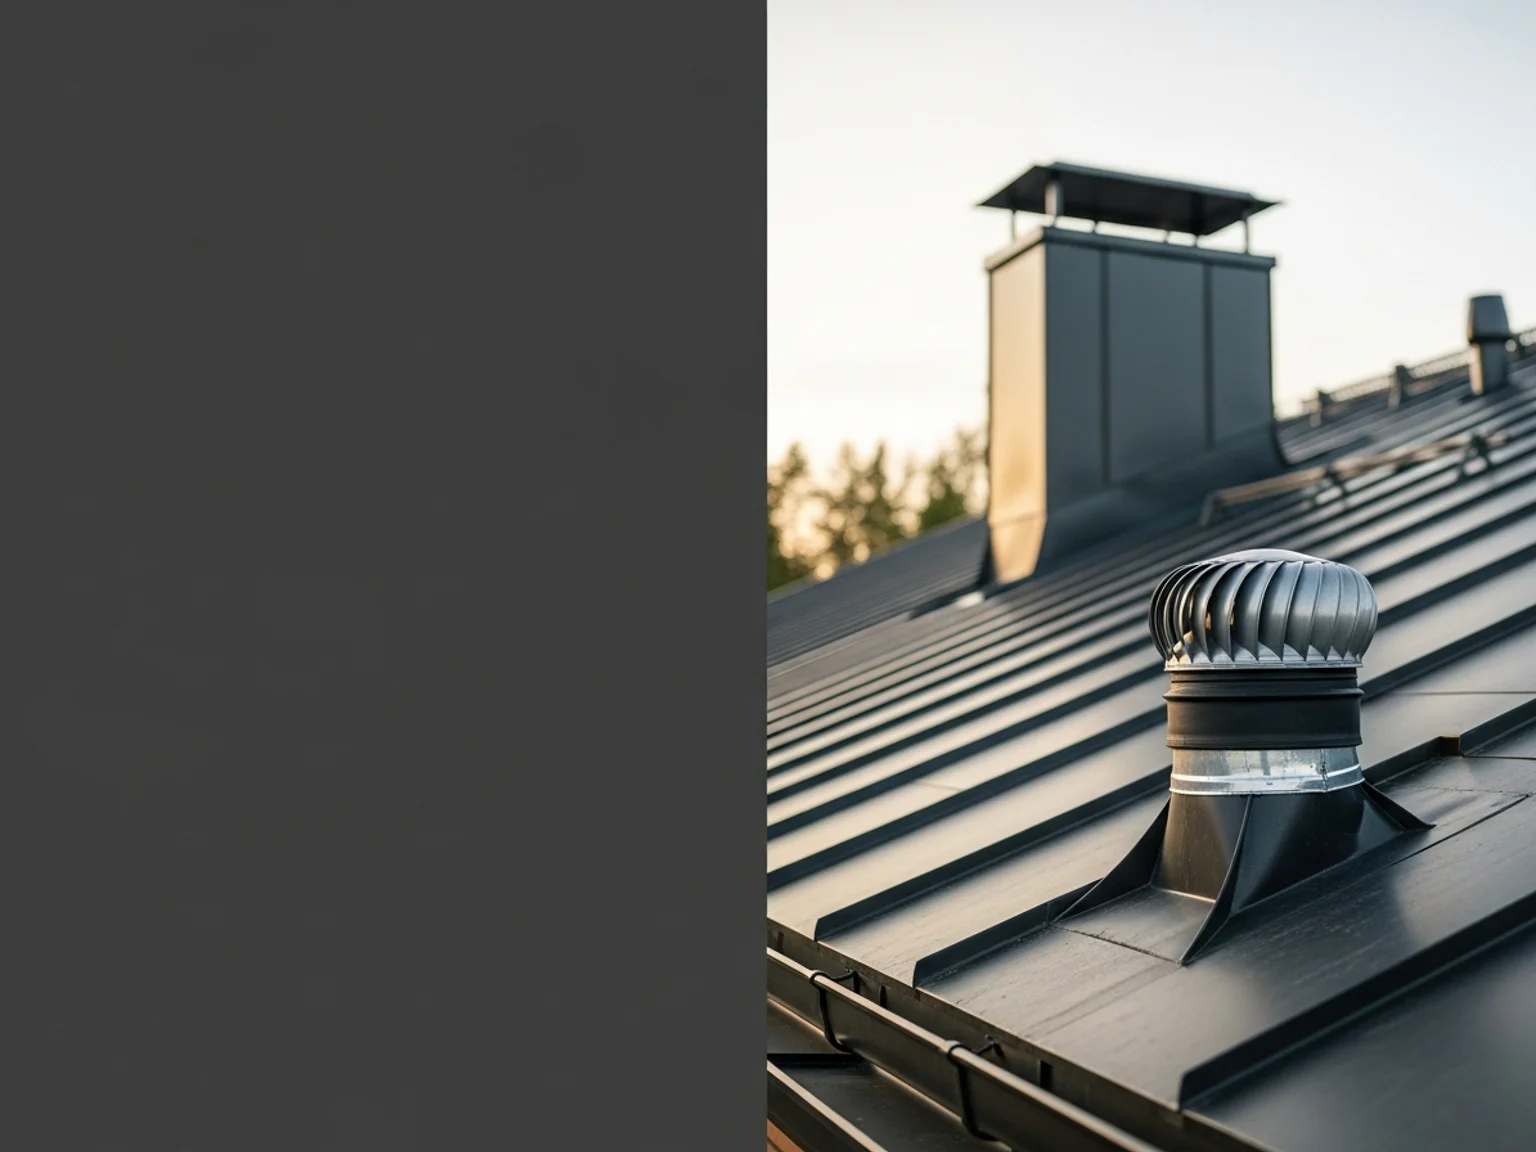
Putkimaiset läpiviennit (viemärin tuuletusputket, ilmanvaihtokanavat) tiivistetään kumisella läpivientikappaleella, joka muotoillaan kateprofiilin mukaan. Peltikatossa käytetään EPDM-kumista läpivientikaulusta, jonka laippaosa liimataan ja ruuvataan katteen päälle. Tiilikatto edellyttää erityistä läpivientitiilet tai lyijylaippoja.
Savupiipun läpivienti on katon vaativimpia detaljeja, sillä piipun ja katteen väliin on jätettävä paloturvallinen etäisyys (vähintään 100 mm palavamattomin materiaalein). Piipun ympärille asennetaan erillinen pellitys, joka ohjaa veden piipun ohitse. Tämä pellitys on kokonaisuudessaan oma rakenteensa — katso piipunpellitys-termi tarkemmin.
Kattoikkunoiden läpiviennit ovat laajimpia ja vaativimpia. Kattoikkunan karmiin integroidut pellitykset ja tiivisteet on asennettava täsmällisesti valmistajan ohjeiden mukaan. Virheellinen kattoikkunan asennus on yksi yleisimmistä syistä, miksi omakotitalo vuotaa — jopa uudisrakennuksissa.
Läpivientien yleisimmät ongelmat
Läpivientien suurin uhka on tiivistysmateriaalien vanheneminen. EPDM-kumi kovettuu ja halkeilee 15–25 vuoden kuluessa UV-säteilyn ja lämpötilanvaihteluiden vaikutuksesta. Kuminen läpivientikappale, joka oli asennushetkellä täysin tiivis, voi vuosikymmenen päästä päästää vettä halkeilleen kumin kautta. Siksi läpivientikappaleet on tarkastettava säännöllisesti ja uusittava ennakoivasti.
Toinen yleinen ongelma on puutteellinen aluskatetiivistys läpiviennin kohdalla. Vaikka varsinainen katteen päällinen tiivistys olisi kunnossa, vesi voi kulkeutua aluskatteen ja läpiviennin välisestä raosta alusrakenteisiin. Aluskatteen limittäminen ja teippaaminen läpiviennin ympärille on yhtä tärkeää kuin päällisen tiivistyksen laatu.
Kolmas tyypillinen virhe on läpiviennin sijoittaminen katon painannekohtaan tai liian lähelle räystästä. Alavirrassa oleva läpivienti altistuu suuremmalle vesimäärälle, ja jäätymis-sulamisjaksot voivat nostaa vettä tiivistyssaumojen taakse. Oikea sijoittelu on yksinkertaisin ja tehokkain tapa vähentää läpivientien vuotoriskiä.
Läpivientien huolto ja uusiminen
Läpiviennit tarkastetaan kahdesti vuodessa — keväällä ja syksyllä — osana katon vuosihuoltoa. Tarkastuksessa kiinnitetään huomiota kumitiivisteiden kuntoon, pellitysten saumojen tiivieyteen ja mahdollisiin kosteusjälkiin läpivientien ympärillä. Erityistä huomiota kiinnitetään läpivienteihin, jotka sijaitsevat katon varjopuolella, missä kosteus haihtuu hitaammin.
Kumisten läpivientikauluksien uusiminen on yksinkertainen toimenpide, joka onnistuu kokeneelta kattoasentajalta tunnissa. Vanha kauluksen laippaosa irrotetaan, alusta puhdistetaan ja uusi kappale asennetaan tiivistemassalla ja ruuveilla. Uusimiskustannus on tyypillisesti 100–300 euroa per läpivienti materiaaleineen ja töineen.
Savupiipun ja kattoikkunoiden läpivientien korjaus on vaativampaa ja edellyttää peltisepän ammattitaitoa. Piipunpellityksen uusiminen maksaa 800–2 000 euroa ja kattoikkunan tiivisteiden uusinta 300–800 euroa. Nämä korjaukset kannattaa teettää ennakoivasti kattoremontin yhteydessä, sillä vuotaneen läpiviennin aiheuttaman kosteusvaurion korjaus voi maksaa moninkertaisesti.
Aiheeseen liittyvät termit
Pyydä kattoremonttitarjous ja osallistu 1 000 € lahjakortin arvontaan!
Jätä tarjouspyyntö — olet automaattisesti mukana arvonnassa. Voittaja arvotaan 30.6.2026.
1 000 € lahjakortti
Käytettävissä kaikkiin kattopalveluihimme
Arvontaan osallistuvat kaikki tarjouspyynnön jättäneet. Säännöt: kotikatto.fi/arvonta
Sisältö tarkastettu ja vahvistettu
Päivitetty: huhtikuu 2026